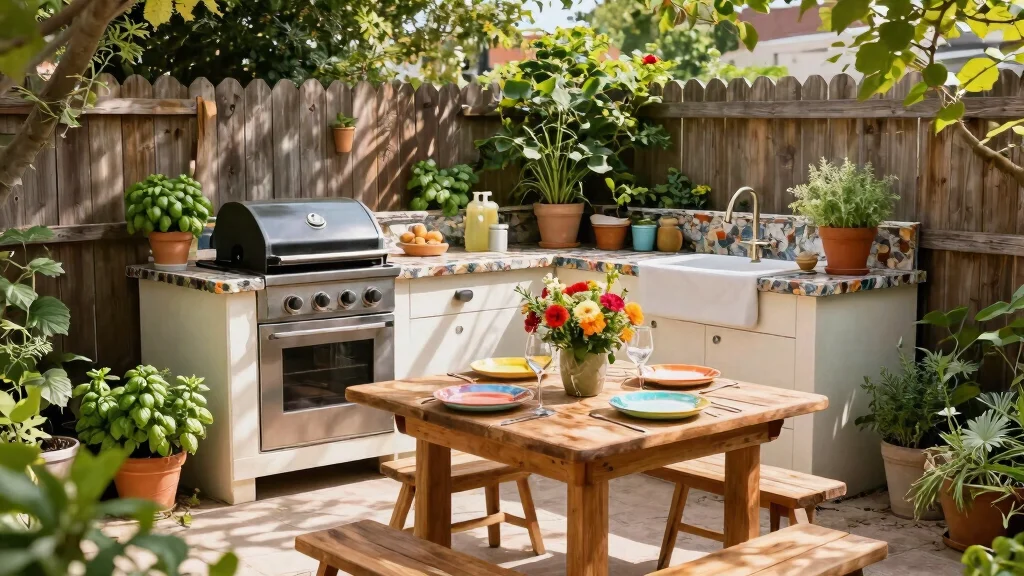
Creating a simple outdoor kitchen is a dream for many, especially as the weather warms up and the days become longer. The thought of cooking and dining al fresco can be both exciting and a little daunting, especially if you’re working with a small urban space. That’s why I put together this list of 11 simple outdoor kitchen ideas that will help you get dinner on the table without overcomplicating anything. Let’s face it—no one wants to spend hours setting up just to enjoy a meal outside.
If you’re someone who loves outdoor cooking, backyard design, or simply enjoys garden dining, this guide is right up your alley. You want to create a space that is both functional and inviting, without the fuss. Whether you live in an apartment with a tiny balcony or you have a small backyard, these ideas are tailored to make your alfresco kitchen dreams come true while keeping meal prep easy and enjoyable.
With these 11 simple outdoor kitchen ideas, you’ll discover practical solutions that fit your lifestyle. From portable grill stations to cozy lighting that sets the mood, each suggestion is designed to inspire you to cook outdoors more often and effortlessly. You’ll get actionable tips that transform your space into a culinary oasis, making weeknight dinners a breeze and weekend gatherings a joy.
Key Takeaways
– Harness the power of a portable grill station to cook delicious meals anywhere in your outdoor space, making it perfect for spontaneous BBQs or family dinners.
– Cultivate an herb garden right in your kitchen area. Fresh herbs add flavor to your dishes and elevate your outdoor cooking experience.
– A compact outdoor dining table helps you maximize limited space while providing a cozy setting for meals under the stars.
– Invest in a multipurpose outdoor cart for easy meal prep and serving, combining style with functionality for all your outdoor gatherings.
– Cozy up your space with outdoor lighting options that create an inviting atmosphere, making every meal feel special and enhancing your outdoor cooking enjoyment.
1. A Portable Grill Station
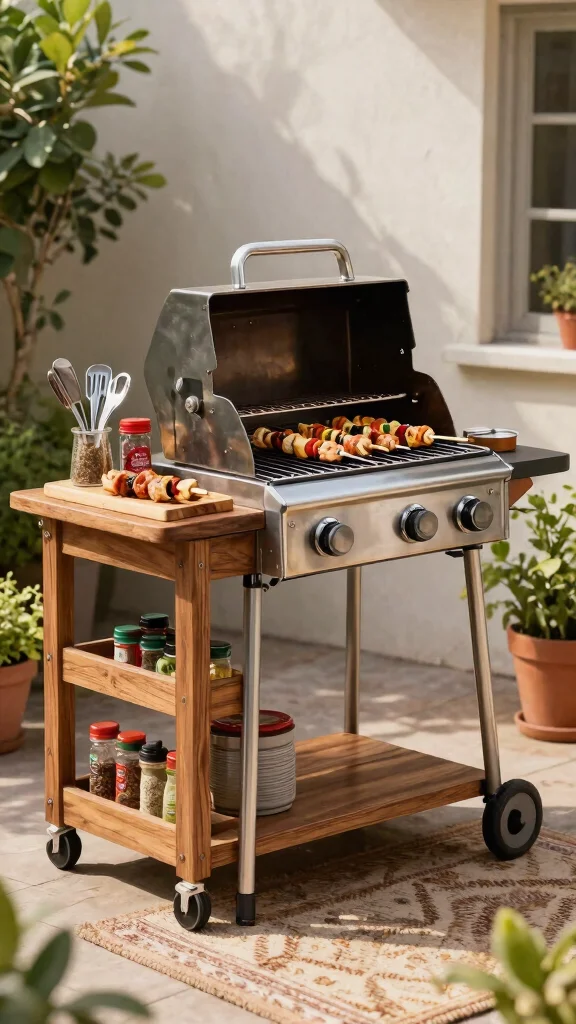
Are you ready to take your outdoor cooking to the next level? A portable grill station can transform any meal into an exciting culinary adventure. It’s perfect for those who love to grill but need flexibility, allowing you to set up in your backyard, on a patio, or even at a park. Plus, portable grills are compact, making them easy to store when not in use.
Imagine sizzling chicken and colorful veggies, all infused with smoky flavor. Opt for a propane grill for quick heating and effortless setup. Pair it with a mobile cart to keep your utensils and spices organized and close at hand.
Tip: Stackable bins are great for keeping your grilling tools tidy. When the grill’s not in action, simply tuck them away!
Recipe Overview:
– Servings: 4
– Prep Time: 15 minutes
– Cook Time: 20 minutes
– Total Time: 35 minutes
Ingredients:
– 1 lb chicken breast, cut into chunks
– 1 red bell pepper, chopped
– 1 green bell pepper, chopped
– 1 onion, chopped
– Olive oil, salt, and pepper to taste
Instructions:
1. Preheat your portable grill on medium-high heat.
2. In a bowl, toss the chicken and vegetables with olive oil, salt, and pepper.
3. Skewer the chicken and veggies alternately on skewers.
4. Grill for about 10 minutes on each side until cooked through and slightly charred.
5. Serve hot and enjoy!
FAQs:
– Can I use this grill indoors? No, it’s meant for outdoor use due to ventilation needs.
– What’s the best way to clean it? Let it cool, then use a grill brush to scrub off residue.
This portable grill setup makes cooking fun and uncomplicated!
How To Choose The Right Simple Outdoor Kitchen
When it comes to creating a simple outdoor kitchen, making the right choices is essential. You want something functional, stylish, and suited for your small urban space. Here’s how to select the perfect setup for outdoor cooking without overcomplicating your backyard design.
1. Size Matters
Before you start shopping, measure your outdoor space carefully. Consider how much room you have for cooking and dining. A compact outdoor kitchen should fit seamlessly into your backyard or balcony without feeling cramped. Leave enough space for people to move around comfortably. A good rule of thumb is to allow at least 3 feet of space between cooking areas and dining spots.
2. Choose the Right Materials
Durability is key when selecting materials for your alfresco kitchen. Look for weather-resistant options like stainless steel for appliances and treated wood or composite materials for countertops. They can withstand the elements while still looking good. Also, consider the aesthetic of your garden dining area to ensure everything harmonizes well. Materials that blend with your garden can enhance the feel of your outdoor cooking space.
3. Functionality Over Complexity
Focus on the features you truly need for outdoor cooking. A portable grill station or a simple fire pit can be perfect for easy meal prep without requiring extensive installation. If you like to entertain, a compact outdoor dining table can double as a prep area. Choose appliances that suit your cooking style and keep everything simple.
4. Budget Wisely
Set a clear budget before diving into purchases. Outdoor kitchens can vary widely in price, depending on the features and materials you choose. Start with the essentials, like a grill and storage options, and consider adding more complex features later. This approach helps you avoid overspending while allowing you to enjoy your outdoor space right away.
5. Consider Ease of Maintenance
Think about how much time you want to spend maintaining your outdoor kitchen. Easy-to-clean surfaces and appliances can save you time. Choose materials that resist stains and rust. For example, stainless steel grills can be wiped down quickly. Planning for low maintenance means you’ll spend more time enjoying your space rather than cleaning it.
6. Assess Climate Considerations
In a small urban space, the weather can greatly impact your outdoor cooking experience. If you live in a rainy area, look for a rain-proof cooking shelter that allows you to cook even when it’s wet outside. On sunny days, shade solutions like a stylish umbrella can keep your dining area cool. Assess your local climate to choose features that enhance your outdoor cooking experience year-round.
Pro Tip: Always think ahead! Plan your simple outdoor kitchen layout to allow for future expansions, like adding a herb garden or extra seating. This foresight can help you create a versatile and enjoyable cooking area that grows with your needs.
By considering these selection criteria, you can design a simple outdoor kitchen that makes outdoor cooking easy and enjoyable. Keep your space functional and stylish, and you’ll be serving up delicious meals in no time!
2. Herb Garden for Fresh Flavors
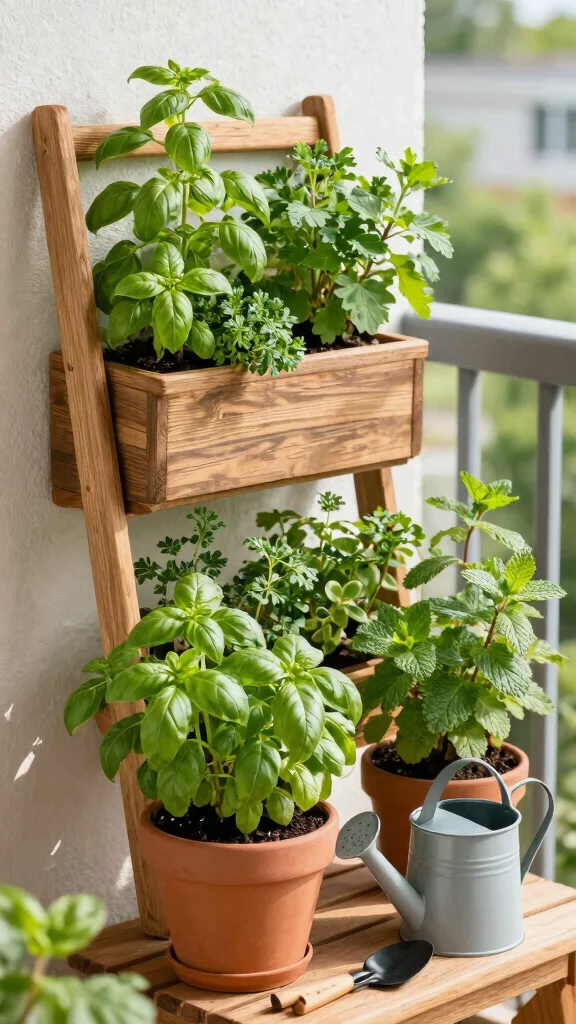
Craving fresh flavors in your meals? An herb garden right outside your kitchen is the perfect solution. Growing herbs like basil, parsley, and mint adds vibrant, aromatic elements to your dishes, making each bite a delight. Plus, harvesting your own herbs is a satisfying way to elevate your cooking game.
Plant them in pots or a vertical setup to maximize space, making it easy to grab a handful whenever you need them. A sunny corner is ideal for these leafy greens, and they’ll thrive with regular watering and care.
Tip: Position your herb garden in a bright spot to encourage growth and flavor!
Recipe Overview:
– Servings: 2-4
– Prep Time: 10 minutes
– Cook Time: 5 minutes
– Total Time: 15 minutes
Ingredients:
– Fresh basil leaves, for garnish
– 1 cup cherry tomatoes, halved
– 1 cup mozzarella balls
– 2 tablespoons olive oil
– Salt and pepper to taste
Instructions:
1. In a bowl, combine cherry tomatoes and mozzarella balls.
2. Drizzle with olive oil, salt, and pepper.
3. Toss gently to mix.
4. Serve fresh with basil leaves on top.
FAQs:
– How often should I water my herbs? Water when the top inch of soil feels dry.
– Can I grow herbs indoors? Yes, as long as they get enough sunlight!
Having your fresh herb garden means simple, flavorful meals at your fingertips!
❝Turn cooking into a quick win with a simple outdoor kitchen built around herbs. A sunny corner with basil, parsley, and mint in pots or a vertical rack keeps fresh flavors within arm’s reach—snip a handful and you’re done.❞
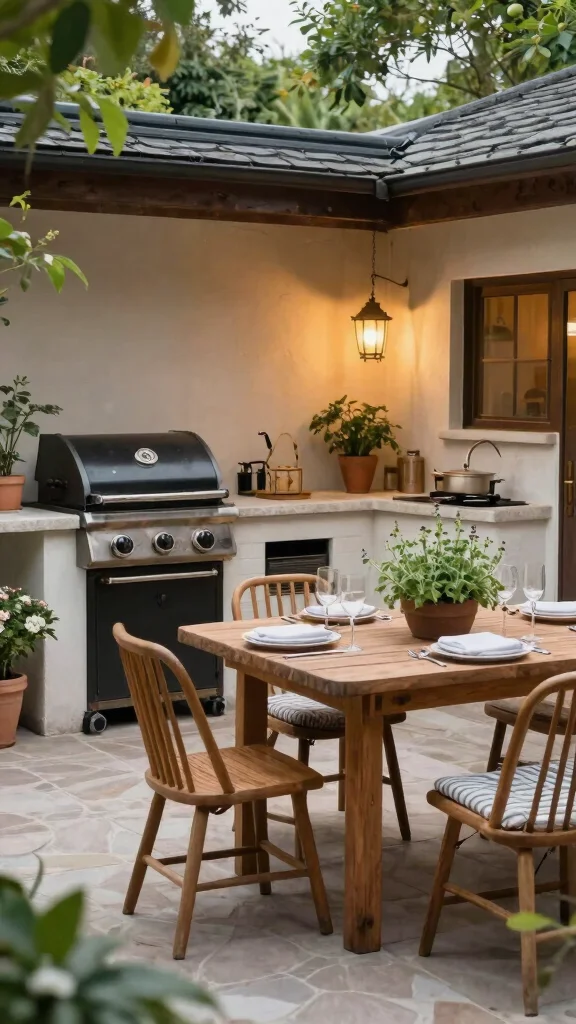
3. Compact Outdoor Dining Table
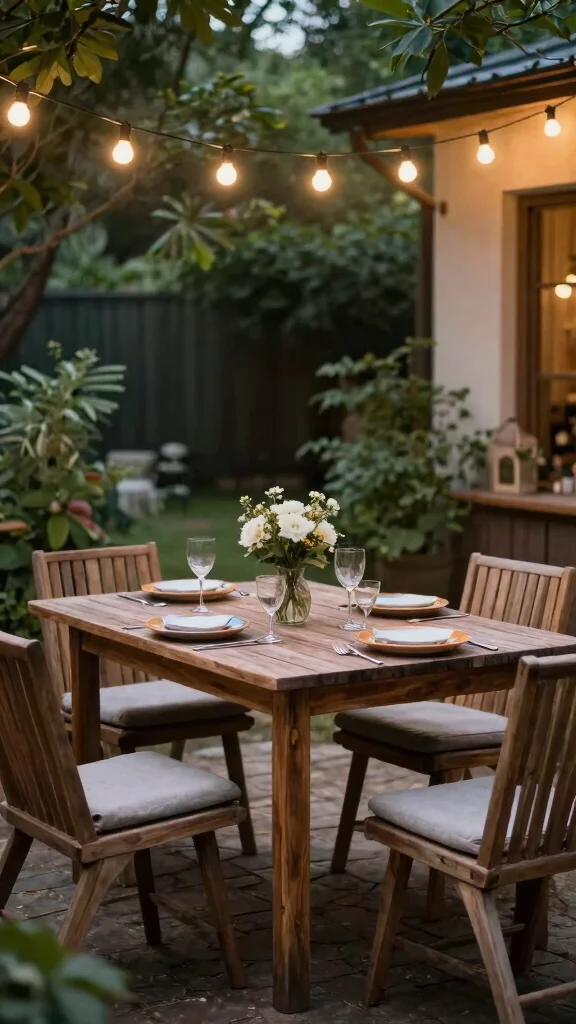
Looking for a cozy spot to enjoy meals outdoors? A compact outdoor dining table is all you need. It doesn’t have to be large or extravagant to bring people together. Opt for a weather-resistant table to make alfresco dining enjoyable without overwhelming your space.
Foldable or extendable tables offer flexibility and can be stored easily when not in use. Dress it up with colorful tableware and a simple centerpiece for a delightful dining experience.
Tip: Keep decorations minimal to avoid clutter and make cleanup a breeze!
Recipe Overview:
– Servings: 4
– Prep Time: 5 minutes
– Cook Time: 15 minutes
– Total Time: 20 minutes
Ingredients:
– 1 lb shrimp, peeled and deveined
– 2 tablespoons garlic butter
– Lemon wedges
– Chopped parsley for garnish
Instructions:
1. Preheat a non-stick skillet over medium heat.
2. Add garlic butter and let it melt.
3. Add shrimp and cook for about 2-3 minutes on each side until pink.
4. Serve immediately with lemon wedges and sprinkle parsley on top.
FAQs:
– What’s the best way to clean an outdoor table? Use mild soap with water and a soft cloth.
– Can I use my indoor table outdoors? It’s best to use furniture specifically designed for outdoor conditions.
A compact outdoor dining table can make every meal feel special!
4. Multipurpose Outdoor Cart
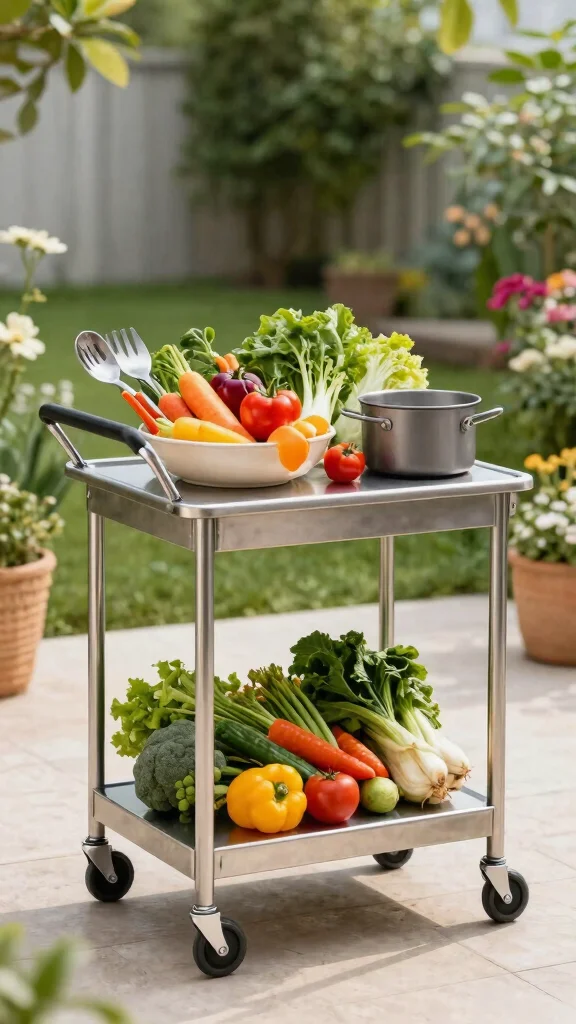
Are you short on space but still want to enjoy cooking outdoors? A multipurpose outdoor cart is your solution. Whether you need it for meal prep, serving drinks, or displaying a mini herb garden, a wheeled cart can easily move wherever you need it.
By organizing essential cooking items and serving dishes on your cart, you create a streamlined outdoor cooking experience. It keeps everything within reach while adding style to your space.
Tip: Select a cart that matches your outdoor decor for a cohesive look!
Recipe Overview:
– Servings: 6
– Prep Time: 10 minutes
– Cook Time: 30 minutes
– Total Time: 40 minutes
Ingredients:
– 1 lb zucchini, sliced
– 1 lb bell peppers, sliced
– 2 tablespoons olive oil
– Salt and pepper to taste
– 1 tablespoon balsamic vinegar
Instructions:
1. Preheat the grill to medium-high heat.
2. Toss the sliced veggies with olive oil, salt, and pepper in a bowl.
3. Place the veggies in a grill basket on the grill.
4. Cook for about 10 minutes, stirring occasionally.
5. Drizzle with balsamic vinegar before serving.
FAQs:
– What materials are best for outdoor carts? Look for rust-resistant materials like stainless steel.
– How do I keep my cart organized? Use bins or baskets to separate items.
A multipurpose cart makes outdoor living so much more convenient and enjoyable!
5. Simple Fire Pit for Cooking
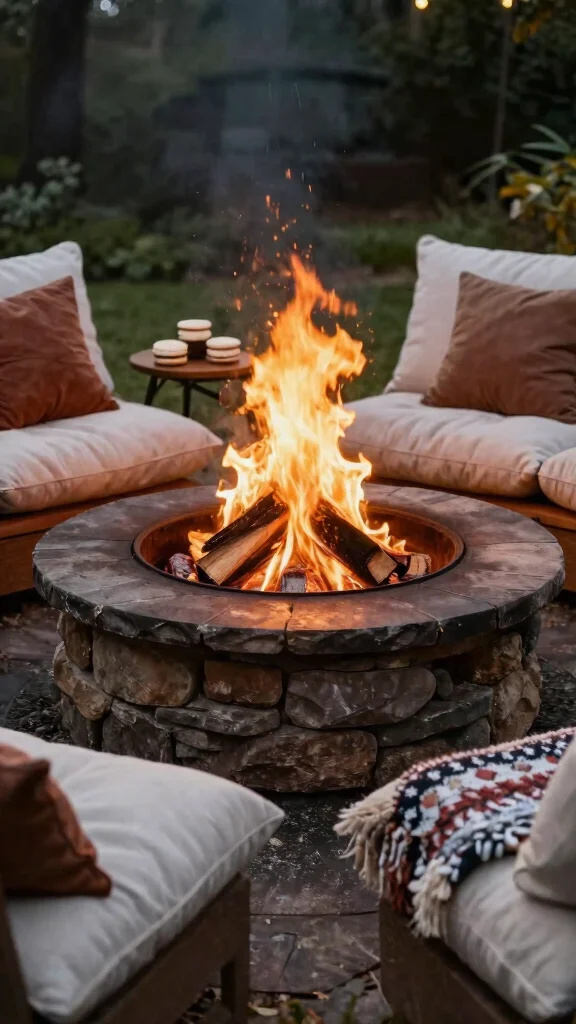
Imagine gathering around a warm fire while cooking delicious meals outdoors. A simple fire pit can add warmth and a unique cooking experience to your outdoor kitchen. It’s perfect for roasting marshmallows or grilling skewers, turning your backyard into a cozy retreat.
Choose a compact fire pit that’s easy to set up and use. Surround it with comfortable seating for relaxation, and enjoy the flickering flames and ambiance during your evenings outdoors.
Tip: Always prioritize safety by having a fire extinguisher or a bucket of water nearby!
Recipe Overview:
– Servings: 4
– Prep Time: 10 minutes
– Cook Time: 15 minutes
– Total Time: 25 minutes
Ingredients:
– 1 lb marshmallows
– 4 graham crackers
– 4 chocolate bars
Instructions:
1. Roast marshmallows over the fire pit until golden brown.
2. Place roasted marshmallows on a graham cracker square, top with chocolate, and sandwich with another cracker.
3. Enjoy the delicious s’mores!
FAQs:
– What type of wood is best for fire pits? Hardwoods like oak or hickory are best as they burn longer.
– How do I safely extinguish the fire? Let it burn down entirely and pour water over the ashes.
A simple fire pit can create memorable evenings filled with warmth and delicious food!
6. Built-in Bench Seating
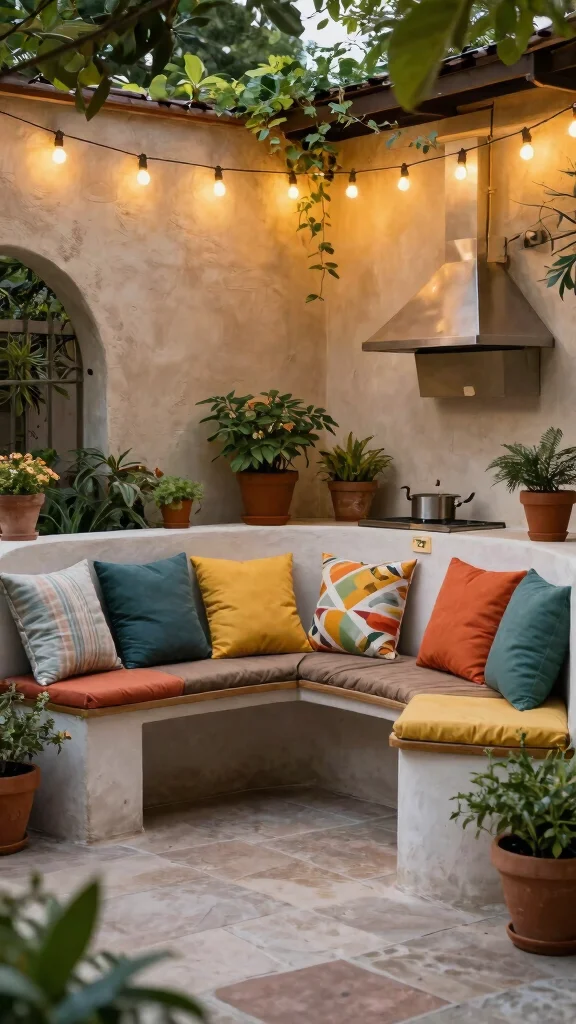
Want to enhance both functionality and style in your outdoor kitchen? Built-in bench seating is the way to go. It provides a stylish place to sit while also offering additional storage underneath, maximizing your space effectively.
Install benches against walls or along garden paths to integrate them seamlessly into your design. Add outdoor cushions or pillows to make them inviting and encourage long, leisurely meals with friends and family.
Tip: Opt for weather-resistant fabrics for cushions to ensure they last!
Recipe Overview:
– Servings: 4
– Prep Time: 15 minutes
– Cook Time: 20 minutes
– Total Time: 35 minutes
Ingredients:
– 1 lb fresh salmon fillets
– 2 tablespoons olive oil
– Lemon slices
– Fresh dill for garnish
Instructions:
1. Preheat the grill to medium-high heat.
2. Brush salmon with olive oil and season with salt and pepper.
3. Grill salmon for 6-8 minutes per side until cooked through.
4. Serve with lemon slices and garnish with dill.
FAQs:
– How do I maintain my outdoor seating? Regular cleaning and weatherproofing will extend its life.
– Can I build my own benches? Yes, DIY benches can be customized to fit your space perfectly.
Built-in bench seating is smart and stylish, enhancing your outdoor kitchen experience!
Fun fact: Built-in benches can add 20–25% more seating and create hidden storage under the seat. You’ll enjoy tidy, accessible space for pots, cushions, and casual meals in your simple outdoor kitchen, perfect for small urban spaces.
7. Easy Meal Prep Station
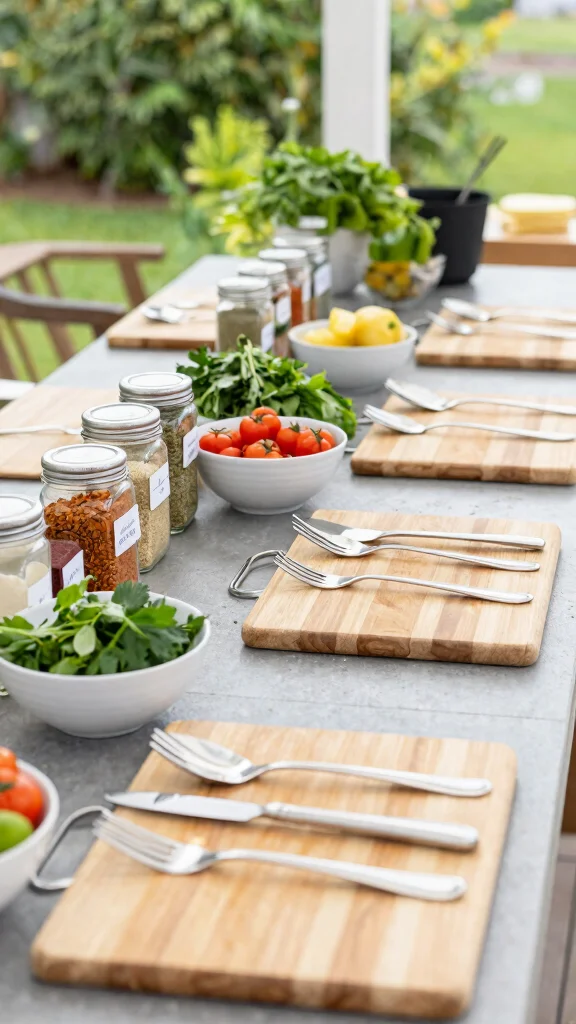
Do you want a smoother cooking experience outdoors? A dedicated meal prep station can simplify your outdoor cooking process. Having all your cutting boards, utensils, and containers in one place keeps you organized and ready to whip up meals quickly.
Set this station close to your cooking area for easy access. Adding storage shelves for spices, oils, and other pantry essentials will further streamline your setup.
Tip: Use labeled jars to identify different spices and ingredients at a glance!
Recipe Overview:
– Servings: 4
– Prep Time: 10 minutes
– Cook Time: 10 minutes
– Total Time: 20 minutes
Ingredients:
– 2 cups quinoa
– 4 cups vegetable broth
– 1 cup corn
– 1 bell pepper, diced
– 1 avocado, sliced
Instructions:
1. Rinse quinoa under cold water.
2. In a pot, combine quinoa and vegetable broth, bringing to a boil.
3. Reduce heat to simmer, cover, and cook for 15 minutes until liquid is absorbed.
4. Fluff quinoa with a fork, then stir in corn and bell pepper.
5. Top with avocado slices before serving.
FAQs:
– How do I keep my prep station organized? Use bins or drawers for different cooking tools and ingredients.
– What’s the best material for a prep surface? A sturdy, weather-resistant material like composite wood works well.
An easy meal prep station can make outdoor cooking less stressful and more enjoyable!
8. Stylish Barbecue Area
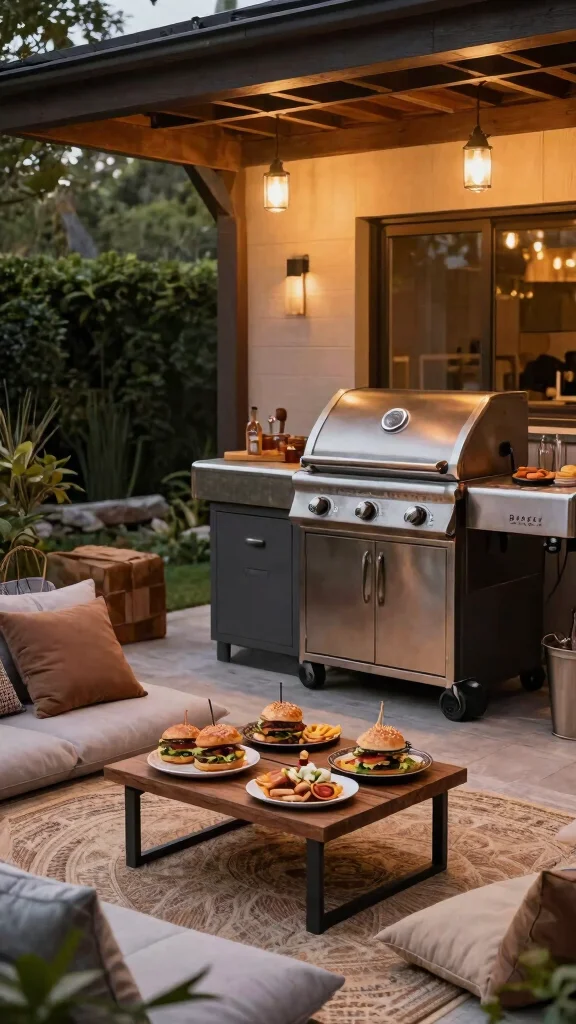
Ready to create a gathering spot in your outdoor kitchen? Design a stylish barbecue area that becomes the heart of your space. Include comfortable seating and a table for drinks and snacks, alongside a grill that fits your cooking style.
Cozy up this area with outdoor rugs, cushions, and shade structures to keep it comfortable during sunny days. It’s the perfect spot for casual gatherings, making serving food and socializing easy and fun.
Tip: Plan themed BBQ nights with unique marinades and sides for an exciting culinary adventure!
Recipe Overview:
– Servings: 6
– Prep Time: 15 minutes
– Cook Time: 25 minutes
– Total Time: 40 minutes
Ingredients:
– 1 lb beef patties for burgers
– Burger buns
– Lettuce, tomatoes, pickles, and cheese for toppings
– Your favorite BBQ sauce
Instructions:
1. Preheat the grill to medium-high heat.
2. Cook beef patties for about 5-7 minutes on each side until fully cooked.
3. Assemble the burgers with your choice of toppings and BBQ sauce.
4. Serve with chips and enjoy!
FAQs:
– How do I choose the right grill? Consider size, fuel type, and your personal cooking habits.
– What are some easy sides to serve? Potato salad or coleslaw are great options!
A stylish barbecue area will make your outdoor cooking experience fun and memorable!
9. Rain-Proof Cooking Shelter
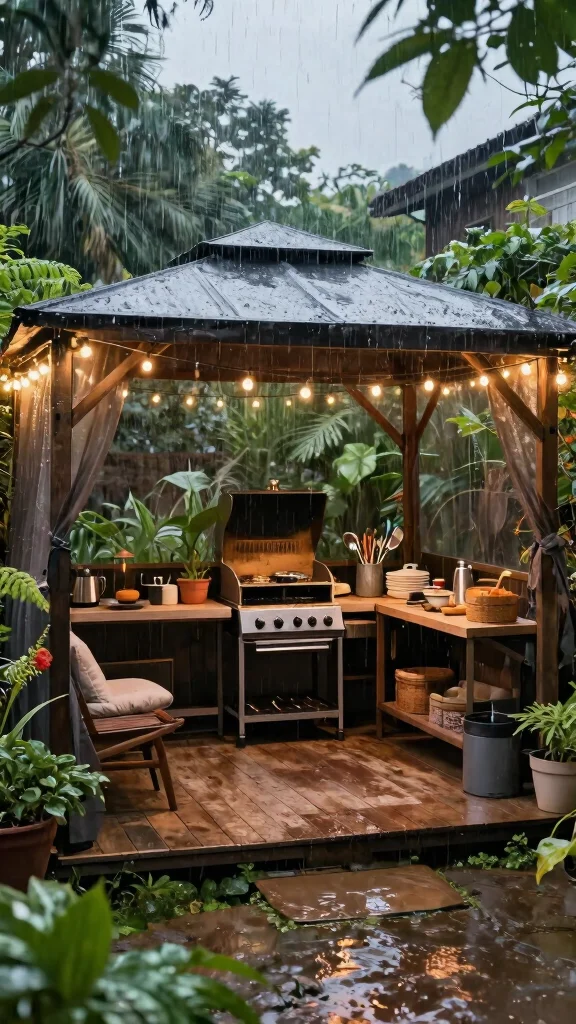
Don’t let the weather stop your outdoor cooking plans! A rain-proof cooking shelter can extend your outdoor cooking season, allowing you to prepare meals regardless of rain. A simple gazebo or retractable awning can keep you dry while grilling or meal prepping.
Create a cozy atmosphere by adding comfortable seating and decorative touches, turning your shelter into an inviting outdoor room.
Tip: Use waterproof covers for your cooking equipment to protect them from the elements!
Recipe Overview:
– Servings: 4
– Prep Time: 10 minutes
– Cook Time: 15 minutes
– Total Time: 25 minutes
Ingredients:
– 1 lb chicken thighs
– 1 tablespoon soy sauce
– 1 tablespoon honey
– 1 tablespoon ginger, grated
Instructions:
1. In a bowl, mix soy sauce, honey, and ginger.
2. Marinate chicken thighs for at least 15 minutes.
3. Grill chicken for about 5-7 minutes per side until cooked through.
4. Serve with rice and vegetables.
FAQs:
– What materials are best for a cooking shelter? Look for durable, weather-resistant materials like metal or treated wood.
– How do I ensure proper ventilation? Make sure there are openings in the design to allow air to circulate.
A rain-proof cooking shelter ensures that your outdoor culinary adventures continue, rain or shine!
❝ Rainy nights don’t derail dinner plans when you have a rain-proof shelter. A simple gazebo or retractable awning keeps your simple outdoor kitchen dry, so grilling and prep can happen year-round. Add cozy seating and waterproof covers to turn the space into an inviting outdoor room. ❞
10. Repurposed Materials for Charm
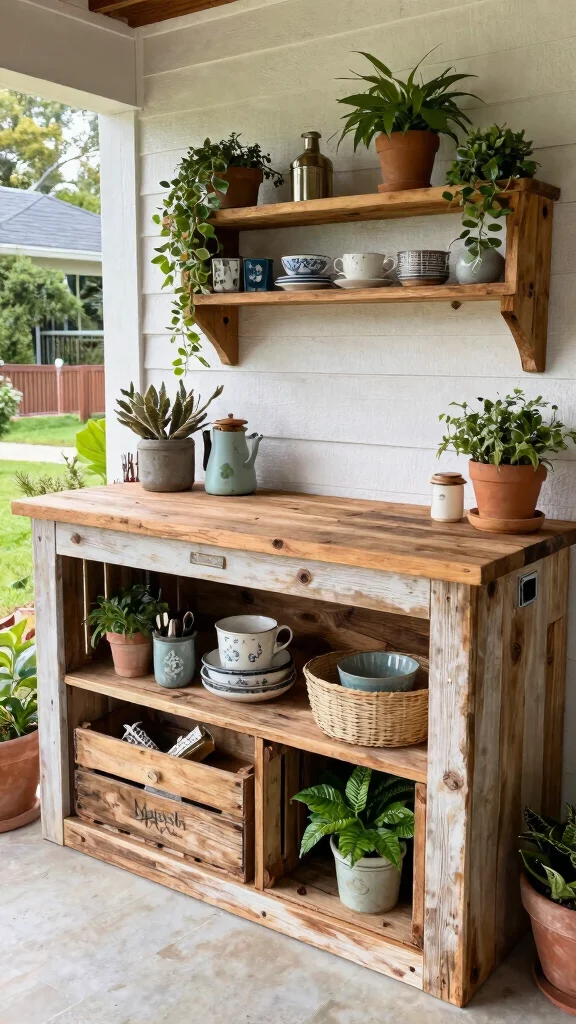
Are you looking to add character to your outdoor kitchen? Using repurposed materials can create a unique and eco-friendly space. Consider reclaimed wood for countertops, vintage crates for storage, or old doors as stylish dividers. Not only do you reduce waste, but you also bring rustic charm to your kitchen.
Be sure to treat any wood with sealant to protect it from the elements. This creative approach not only saves money but also gives your outdoor kitchen a personalized touch.
Tip: Check local thrift stores or online marketplaces for salvaged materials to incorporate into your design!
Recipe Overview:
– Servings: 4
– Prep Time: 10 minutes
– Cook Time: 20 minutes
– Total Time: 30 minutes
Ingredients:
– 1 lb beef cubes for stew
– 2 carrots, chopped
– 1 onion, chopped
– 2 potatoes, diced
– Beef broth as needed
Instructions:
1. In a pot, brown beef cubes over medium heat.
2. Add chopped onions, carrots, and potatoes; sauté until soft.
3. Pour in beef broth to cover ingredients.
4. Simmer until beef is tender, about 20 minutes.
FAQs:
– How do I treat repurposed wood? Use a weatherproof sealant for protection.
– Are there any safety concerns? Ensure that any materials are free from harmful chemicals or treatments.
Repurposed materials not only enhance your outdoor kitchen’s charm but also tell a story!
11. Cozy Outdoor Lighting
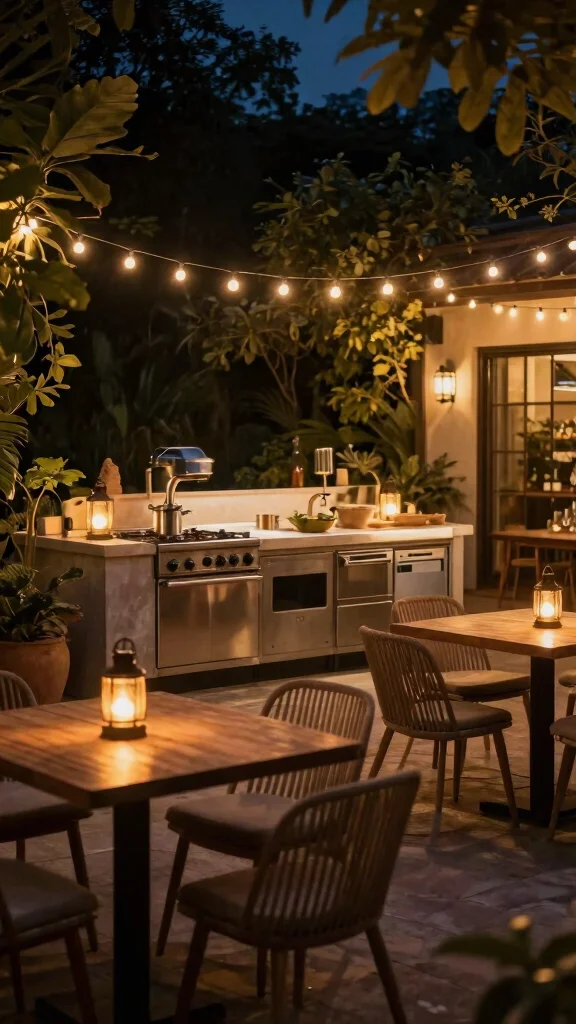
Want to create a magical atmosphere for your outdoor kitchen? Lighting can dramatically enhance the mood and usability of your space. String lights, lanterns, or solar-powered garden lights can transform your area into a warm, inviting spot for evening cookouts and gatherings.
Position lights above cooking stations, along pathways, and around dining areas to set the perfect ambiance. A cozy and well-lit space can make every meal feel like a special occasion.
Tip: Choose warm-colored lights for a comforting vibe!
Recipe Overview:
– Servings: 4
– Prep Time: 5 minutes
– Cook Time: 10 minutes
– Total Time: 15 minutes
Ingredients:
– 4 ears of corn, husked
– Butter
– Salt and pepper to taste
Instructions:
1. Preheat the grill to medium heat.
2. Wrap each ear of corn in aluminum foil with butter, salt, and pepper.
3. Place on the grill and cook for about 10 minutes, turning occasionally.
4. Serve hot.
FAQs:
– What’s the best type of outdoor lighting? LED string lights are energy-efficient and long-lasting.
– How do I safely hang lights? Use outdoor-rated extension cords and hooks for secure installation.
Cozy outdoor lighting elevates your space, making every meal feel like a special occasion!
Conclusion
Transforming your small urban space into a simple outdoor kitchen is not only achievable but can be incredibly rewarding.
With these 11 ideas, you can create a functional and inviting cooking and dining area that encourages you to embrace outdoor living. From portable grill stations to cozy seating and innovative lighting, each element combines practicality with style.
By blending functionality with charm, you’ll find that outdoor cooking can be both simple and enjoyable, making every meal a delightful experience.
Note: We aim to provide accurate product links, but some may occasionally expire or become unavailable. If this happens, please search directly on Amazon for the product or a suitable alternative.
This post contains Amazon affiliate links, meaning we may earn a small commission if you purchase through our links, at no extra cost to you.
Frequently Asked Questions
What makes a simple outdoor kitchen ideal for small urban spaces?
A simple outdoor kitchen shines in small urban spaces because it focuses on a compact footprint, multifunctional components, and easy maintenance.
Think of a small grill or two-burner stove, a slim prep counter, weatherproof storage, and folding seating. Plan a layout that keeps surfaces clear and uses outdoor cooking workflows that don’t overwhelm the area.
Tip: start by measuring your space and sketching a 6–8 ft counter that leaves room for a garden dining setup nearby, so the alfresco kitchen feels integrated with garden dining.
How can I design a simple outdoor kitchen that fits my space and budget without overcomplicating things?
Begin with a clear plan: map the space, identify core needs (grill or stove, prep surface, and basic storage), then choose affordable, durable materials. Use modular pieces you can expand later, and keep upkeep minimal with weatherproof surfaces and simple finishes.
Focus on easy meal prep and backyard design that supports flow from house to dining area. Start small with a portable grill and a compact counter, then add a sink or fridge only if it fits your routine and budget.
Which outdoor cooking gear and layout tips help with easy meal prep in a small balcony or patio?
Opt for compact, multi-use gear: a small grill or two-burner stove, a slim prep table, and a collapsible cutting board that can live on the counter. Add weatherproof storage, a portable sink or water container, and a small trash/recycling setup.
Layout tips: keep the cooking zone and prep area adjacent, store frequently used tools within arm’s reach, and leave a dedicated spot for quick garden dining moments. Lighting and seating should be simple and flexible to maintain a tidy look in an urban space.
How can I keep my simple outdoor kitchen safe and durable through weather and pests?
Choose weatherproof materials (sealed wood, powder-coated metal, or Stone/Concrete surfaces) and seal any wooden components. Use covers, place electrical outlets and gas connections according to code, and store fuel safely away from heat. For pests, keep the prep area clean, use sealed containers, and consider simple garden-friendly pest controls like proper drainage and container herbs.
Regular maintenance keeps your alfresco kitchen looking great and ready for outdoor cooking any day.
How do I integrate a simple outdoor kitchen with my garden and backyard design for cohesive alfresco dining?
Aim for a natural flow between indoors and outdoors. Position the prep zone near the house for easy access to water and power, and design a path that connects to the garden beds and seating area. Incorporate a small herb garden or vertical planters near the prep space to boost garden dining convenience and flavor. Choose a cohesive color palette and lighting that tie the backyard design together, creating an inviting alfresco kitchen that feels like an extension of your home.
Related Topics
simple outdoor kitchen
urban gardening
backyard cooking
easy meal prep
alfresco dining
small space design
budget friendly
DIY outdoor kitchen
minimalist cooking
quick recipes
outdoor entertaining
seasonal cooking